


1. Aeration system installation
1.1 tube diffuser Overview
1.2 Adjusting Aquasust Bubble Disc Diffuser and Aquasust Tube Diffuser
2. Aquasust Aeration System Trial Operation
2.1 Trial Overview
2.2 Disc Diffuser and Tube Diffuser Debug
2.3 Oxygen transfer rate measurement
2.4 Idle time before starting continuous operation
3. Air supply operation
3.1 Aeration systems of designed
3.2 Air system supply
3.3 Daily operation of Aeration system
3.4 Operation of water level height difference
3.5 Regular inspection of aeration system
3.6 Aeration system shut down
4. Concept of Disc diffuser
4.1 Concept of disc diffuser
4.2 Maintenance of Aquasust Disc type diffuser

1. Aeration System Installation
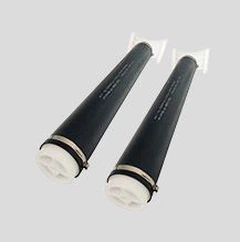
1.1 Tubes diffuser Overview
Tube diffuser need to be stored in their original packaging in a dry, ventilated room. Please do not store in outdoors!
1.1.1 Inspection
Before each aerator is installed, it must be checked for damage, focusing on the aeration membrane part. When checking the tube diffuser, check the clamps to make sure they are tightly connected.
1.1.2 Installation preparation
When using a cutter to open the carton, care should be taken to ensure that the tube diffuser is not accidentally damaged. When the packing carton is opened, the aeration tube can not be dumped on the bottom surface of the cement tank, which will cause the aeration membrane to be damaged.
1.1.3 Aeration Piping Keep it cleaning
After the air distribution pipe is installed and connected to the main air pipe, it is necessary to input compressed air to purge for about 10 minutes to remove the debris inside the pipe.
Pre-open all valves on the riser before starting the fan and make sure the pipes are clear and unobstructed. An opening should be provided at the end of the air distribution pipe to allow debris to drain out of the system. The opening of the pipe can be closed without the cap first. Run the system at maximum fan capacity to increase air flow in the air distribution ducts. In addition, a portion of the valves on the riser can be closed if necessary to allow higher flow rates in the remaining air distribution pipes. The high-velocity airflow can blow out the debris accumulated in the pipeline.
Open and close the valve of the air distribution line to purge the remaining air distribution line one by one. After the air purge is complete, turn off the fan and install the end caps of the air distribution pipes. Install the aerator to the air distribution pipe. Make sure all valves are open before filling the aeration tank.
Stones, wood chips and other debris in the pool must be removed. Also, after connecting the aeration pipe to the air distribution pipe, construction such as welding, painting, cement sealing, etc. cannot be performed in the treatment tank area. If such construction cannot be avoided, all aeration pipes must be covered with thick plastic film for protection until the above construction is completed.
1.2 Adjusting Aquasust Bubble Disc Diffuser And Aquasust Tube Diffuser
1.2.1 Adjusting the Aquasust disc type diffuser and Aquasust tube diffuser
Aquasust Aeration tube diffuser
Air distribution within the tube diffuser is affected by the level of the Aquasust tube type diffuser. To ensure the normal operation of the system, Aquasust recommends that the level deviation of the end of each pair of aeration pipes is ± 20mm. If the level deviation of the aeration pipes is too large, the air distribution of the system will be adversely affected.
Aquasust disc aerator
Make sure that the socket head is securely installed on the air distribution pipe and the aeration pan is firmly installed on the socket head. The diaphragm surface of the installed aeration pan should be parallel to the bottom of the tank.
1.2.2 Adjusting the air distribution pipe
Since the bottom of the treatment tank may be uneven, the height of each individual air distribution pipe needs to be adjusted by means of adjustable stainless steel pipe fixing brackets to ensure that the air distribution pipe is as level as possible. Aquasust recommends that the level deviation from the head to the tail of each air distribution pipe is ±10mm.

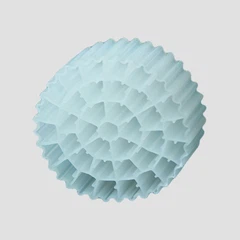
Disc diffuser tray being tested
2. Aquasust Aeration System Trial Operation
2.1 Trial Overview
The following instructions contain the requirements for general commissioning of Aquasust aeration systems. Special commissioning requirements in engineer specifications and contract documents must be annexed to or in place of these general specifications.
2.2 Disc Diffuser and Tube Diffuser Debug
After the installation of Aquasust disc diffuser or Aquasust tube diffuser is completed, the trial of the aeration system must be carried out immediately. Start to inject clean water into the treatment tank to the height of Aquasust disc diffuser or Aquasust tube diffuser. Make sure that the level of all Aquasust smart disc tyoe diffuser or Aquasust smart tube diffuser is consistent with the horizontal plane. If the height difference between the air distribution pipe and the horizontal plane is greater than 10mm, adjust the height of the air distribution pipe to the allowable deviation range. Continue to fill the treatment tank with water until the water level is approximately 20 cm above the Aquasust smart disc diffuser or Aquasust smart tube diffuser. Start the fan and supply air to the aeration system, starting with a low air delivery rate of about 2 - 3Nm3/h.m through the Aquasust smart disc diffuser or Aquasust smart tube diffuser. Check the air duct and aerator connections for leaks. If there is a leak in the air pipe or the air distribution pipe is leaking at the connection of the aeration pipe, drain the water in the treatment tank to a certain height so that the leak point is exposed and repaired. After that, re-inject water into the treatment tank to 20cm higher than the aerator before checking. When there is no leakage after inspection, close the valve on the riser to stop the air supply to the air distribution pipe, and observe whether there are bubbles emerging from the Aquasust smart disc diffuser or Aquasust smart tube diffuser connection.
2.3 Oxygen transfer rate measurement
Before measuring the oxygen transfer rate, the aeration system needs to be continuously ventilated for at least 48 hours at the delivery rate of the tube diffuser with a minimum ventilation rate of 8 Nm3/h.m to ensure the normal operation of the aerator. Otherwise, please follow the latest version of the local wastewater purification regulations.
2.4 Idle time before starting continuous operation
If the aeration system is not put into use immediately after commissioning, the water level of the system needs to be raised to 1m above Aquasust smart disc diffuser or Aquasust smart tube diffuser. This water level must be maintained until the system is finally put into operation. Make sure that the water level does not drop as the water evaporates. In frost conditions, the water level above Aquasust smart disc diffuser or Aquasust smart tube diffuser should be at least 10% of the minimum temperature.
E.g:
At an air temperature of –20℃, the water depth above the aerator is 2m.

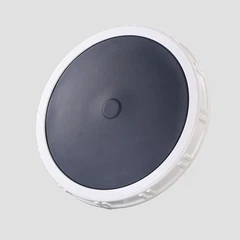
Disc diffuser EPDM menbrane
3. Air Supply Operation
3.1 Aeration systems of designed
Aeration systems are usually designed to provide even air distribution and only adjust the valve on the riser when there is a difference in water level. These valves are only used for direct control of air distribution or process control in large area aeration systems. The Aquasust smart disc diffuser or Aquasust smart tube diffuser has no moving parts and requires minimal maintenance for long-term operation. Aquasust recommends that the Aquasust aerators be maintained at the airflow rate for optimal operation. Long-term operation at too high aeration may cause the diaphragm to be damaged. The maximum air supply cannot be exceeded unless approved by Aquasust Technical Department.
NOTE: Care must be taken when adjusting the branch chokes of several of the same piping system, otherwise the operation may cause the air flow of part of the aeration system to exceed the maximum allowable air supply.
3.2 Air system supply
The air supply system should be free of oil, dust, and solvents and should include a filtration system. The design value of the environmental dust filter achieves 90% filtration effect, which meets the requirements of local implementation standards, filtration grade G4. The maximum air temperature at the inlet cannot be higher than 80°C. It can only be applied to higher temperatures with the permission of Aquasust's technical department.
3.3 Daily operation of aeration system
To ensure that the aeration system can maintain satisfactory aeration results, the following basic rules should be followed. Adjust the gas flow in the treatment tank to just maintain the required amount of dissolved oxygen. When adjusting the air flow, be careful not to exceed the general air supply range of the aerator. Excessive airflow will increase diaphragm pressure loss and reduce oxygen transfer efficiency. If the air flow rate is lower than the recommended value, the utilization rate of the aerator will be reduced, resulting in uneven aeration.
During normal operation, the entire aeration system should have excess dissolved oxygen concentration. The measurement of dissolved oxygen can determine the performance of the aeration system. Typically, the performance of aeration systems can be determined by measuring dissolved oxygen at the inlet, outlet, and central locations of the treatment tank. When adjusting the air flow of the system to control the amount of dissolved oxygen, be careful not to exceed the maximum and minimum aeration rates of the aerator.
3.4 Operation of water level height difference
In some applications, the water level of several treatment tanks supplied by the same fan is different, and the valve needs to be adjusted to ensure proper airflow distribution. The usual method is to close the gas supply valve of the treatment tank with the lower water level. It is important to confirm the aeration volume of the aerator before closing the small valve. If the Aquasust aeration diffuser is operated at a higher than recommended aeration rate for a long time, it may cause damage to the Aquasust aeration diffuser. Consult the Aquasust Technical Application Department before operating at higher than the maximum recommended aeration rates.
3.5 Regular inspection of aeration system
Periodic inspections of the system help operators determine whether the system is operating at optimum efficiency. For example, if the height difference of the installation level of the Aquasust Aeration exceeds the usual design requirement of ±20mm, the air distribution uniformity of the air distribution pipe will be reduced. In addition, operating at lower ventilation than design conditions can also reduce the uniformity of air distribution.
The following are the abnormal operation characteristics of the aeration system and their treatment methods.
a. Locally large air volume
Possible reason:
• Loose connections between aeration and air distribution pipes.
• Aeration membrane rupture
Measure:
• Drain the problem pool.
• Check one by one for loose connections and rupture of aeration membranes, and repair immediately if problems are found, refer to Section 4 of this manual.
b. Bubble distribution is reduced and an increase in blower pressure loss is observed.
Possible reason:
• Diaphragm blocked.
• The air volume of the blower is reduced.
• Air distribution ducts are throttled.
Measure:
• Drain the problem pool.
• Check the surface of the aeration membrane for blockage. If necessary, clean or replace the diaphragm.
• Check blower operation.
• Check the shut-off valves on each riser.
c. Dissolved oxygen throughout the treatment tank is not satisfactory.
Possible reason:
• Increased water treatment capacity in the system.
• The air volume of the blower is reduced.
• Inappropriate air distribution system.
• System leaks.
Measure:
• Check the water capacity of the system.
• Check the operation of the blower.
• Refer to 3.5 a and b for measures of the first two questions.
3.6 Aeration system shut down
If the gas supply is interrupted at any time, the gas supply should be restored immediately. When restarting a positive displacement blower, follow the operating procedures recommended by the blower supplier. If the vent valve is venting for too long, the vent setting should be checked.
If the aeration tank will be out of use for an extended period of time, the tank should be drained and cleaned. If the draining time is more than one day, aeration with minimum ventilation should be maintained during the draining period.
Immediately after the drainage of the treatment tank, flush the Aquasust aeration diffuser with high pressure water to remove the sludge on the surface of the aeration membrane. Residual sludge on the surface of the aeration membrane can cause the sludge to dry quickly, especially in hot weather conditions. This dry sludge will affect the aeration efficiency of the aeration membranes when the system is run again in the future.
Care should be taken when removing sludge from the bottom of the tank to prevent damage to the Aquasust aeration diffuser. Sludge that is not easy to remove near the aerator should be flushed with a high-pressure water gun and removed with a suction pump. Avoid using a shovel or other mechanical tool to remove silt near the Aquasust aeration diffuser, which can cause accidental damage to the Aquasust aeration diffuser.
After cleaning the aerator and the bottom of the treatment tank, inject 1m deep water into the treatment tank to prevent the aerator from being accidentally damaged.
If the aerator is disabled for a long time, it should be ensured that the aerator is supplied with air at the maximum air supply once a week and maintained for about 20 minutes.
4. Concept Of Aeration Diffuser
4.1 Concept of aeration diffuser
Aquasust aeration tube diffuser and aeration disc diffuser are a kind of microporous aerator and can provide the best oxygen transfer rate and stirring effect. Proper operation and maintenance can extend the life of the aerator, reducing power consumption and maintenance costs. Preventive maintenance measures can keep Aquasust microporous aerators diffuser in good performance for a long time, prolong the life of the equipment, and prevent emergencies or system failures. Proper maintenance measures can also reduce the chance of unplanned system outages. The following rules should be followed when maintaining the aeration system:
Prevent the rubber diaphragm from coming into contact with organic solvents, such as aromatic hydrocarbons, which can cause the expansion of the aeration diaphragm.
A good air filter is a must when using a microporous aerator. The inlet of the blower is equipped with a filter that can achieve 90% dust removal effect, which meets the requirements of local wastewater standards and filtration grades to prevent the micropores of the rubber membrane from being blocked.
After the aeration diffuser is used for a long time, the pressure loss will increase significantly. This increase in pressure loss is often caused by microbial or inorganic deposits that grow on the membrane surface. The rate at which this pressure loss increases depends on the quality of the wastewater being treated and the operating conditions of the wastewater treatment process. To restore diaphragm performance and reduce pressure loss, please refer to the following sections.
Aquasust recommends recording the pressure value of the aerator during the first operation in order to determine the cleaning cycle. The pressure loss was recorded at the same flow rate at a later date. It is recommended to clean the aerator frequently and when the pressure loss exceeds 30mbar. Usually the pressure gauge needs to be able to measure pressure up to 1 bar, and the pressure sensitivity must also be between 0.1%-0.5%. The air volume of the duct will determine the measurement needs of the air meter. Depending on the system design, the aerator is maintained by emptying the aeration tank or by raising the aerator above the water surface by means of a lift aeration grid. If the drain cycle exceeds 1 day, it is necessary to maintain the air supply at the minimum ventilation rate while draining.
Here are the items you will need to maintain the aerator:
1. high pressure water gun
2. Ladder
3. Protective gloves and protective clothing
4. Clean the long-handled brush of the aerator
5. Special caliper and single ear clamp (for aeration tube)
6. Spare diaphragm
4.2.1 On-site cleaning of the aerator diaphragm
Depending on the water quality of the sewage treated by different plants and the specific operating conditions of the sewage treatment process, different treatment plants will have different frequencies of membrane cleaning. The rubber membrane needs to be cleaned because two common substances, microbial sludge or inorganic deposits, can adhere to the surface of the membrane. Below are the detailed cleaning steps.
4.2.1.1 Sludge deposition/microbial attachment
It is recommended to use an adjustable industrial high pressure water gun method with a maximum of 400-500 liters per hour and 140 bar to remove deposits on the membrane surface. The required water pressure depends on the amount of sediment and how long it remains on the diaphragm. During flushing, keep the air supply of 4-5 m3/h for the aeration tube, 1.5-2 m3/h for the DD215 aeration pan, and 3-4 m3/h for the DD300 aeration pan of air supply. Gradually increase water pressure as appropriate during flushing. The duration of flushing depends on the difficulty of the deposit, water pressure, height from the aerator, etc., usually 10-15 seconds per aeration tube or 5-10 seconds per aeration disc diffuser.
4.2.1.2 Inorganic deposition
Inorganic deposition is mainly manifested in the deposition of mineral particles such as calcium or iron on the surface of the membrane. If it cannot be removed with brushes or high pressure water guns, 85% formic acid can be used to break down most of the inorganic deposits. This is the natural decomposition of the organism and does not affect the biochemical process. At the same time, formic acid does not corrode PVC, PP and stainless steel air distribution pipes. Large and prolonged exposure to formic acid may corrode galvanized air distribution pipes. 85% formic acid is a volatile acid that is harmful to the skin. Formic acid gas irritates the mucous membranes of the eyes and respiratory tract and is dangerous if inhaled. Therefore, it must be carried out in an open environment. A respirator should be worn. Goggles and rubber gloves should be worn to prevent splashing on the skin. Formic acid should be kept away from fire or other heat sources. Combustion of formic acid can be extinguished with dry powder or carbon dioxide fire extinguishers. Workers should be made aware of their safety instructions prior to formic acid cleaning. Safety instructions and first aid measures must be available on site.extinguishers. Workers should be made aware of their safety instructions prior to formic acid cleaning. Safety instructions and first aid measures must be available on site.
The following are the amounts and durations required for the various deposits:
|
g (Formic Acid)/m3 (Air) |
Duration (minutes |
|
|
Calcium fouling |
20 | 5 to 10 |
|
Iron scale |
50 | 30 to 60 |
The washing steps should be performed in groups of short time periods lasting 2 minutes. If the cleaning is carried out at one time for a long time, the air will only pass through the pores of the membrane that have been unclogged first. Other membrane pores cannot be cleaned due to insufficient air flow. Formic acid should be delivered by a dosing pump to control its dosage.
Before cleaning the Aquasust aerator diffuser, open the drain valve of the distribution pipe to drain the condensate from the air distribution pipe. Clean the riser connections before connecting the acid hose. Air is allowed to enter the acid tank during acid addition to prevent the formic acid from evaporating.
4.2.2 Replacing Aquasust tube diffuser /aeration disc EPDM membrane
If it is checked that the EPDM membrane needs to be replaced, the following regulations must be followed.
1. Use a crimping tool or a flat-blade screwdriver to easily lift the protruding teeth on the clamp to remove the single-ear stainless steel clamp. Operators should not attempt to snip or cut the single lug of the clamp, as the stainless steel material is very hard and requires extra force to cut through the material.
2. Pull out the EPDM membrane from the support tube.
3. Clean the support tube. Put the new diaphragm on the support tube, with the non-perforated part of the membrane aligned with the air outlet of the support tube. The diaphragm should only be secured to the support tube with a stainless steel single-ear clamp with a smooth inner surface. Threads cannot be used to tighten clamps. The single lug of the clamp must be aligned exactly with the groove of the diaphragm. There is a clamp between the air outlet opening end of the support pipe and the collar of the support pipe and the end of the support pipe at a distance of 2-4 mm from the installation groove. Clamps cannot be installed on support tube mounting slots or perforated membranes. (Fig. 16)
4. Use a special manual caliper to clamp the clamp. Firmly clamp the clamp to ensure that the connection does not leak. Clamp 'x' must be less than 2.0mm. (Fig. 17)
5. Please use special clamping pliers, because the use of ordinary clamping pliers may cause circular bending of the single ear of the clamp after clamping. The top of the clamp lug should form a flat surface.


Note: The non-perforated part of the diaphragm should be facing up/down and facing the outlet opening of the support tube to act as a check valve.
4.2.3 Replacement of standard Aquasust tube diffuser
If it is necessary to remove the standard Aquasust aeration tube from the air distribution tube, the following basic procedure must be followed:
1. Shut off the air supply to the appropriate air distribution line.
2. Use a screwdriver and a ratchet wrench with the mounting connector to remove the threaded rod.
3. Reinstall the aeration tube following the installation requirements.
Properly used and maintained, Aquasust aeration systems can provide many years of efficient, low-maintenance operation. For questions about the operation and maintenance of Aquasust aeration system, please contact your sales consultant.
4.2.4 Replacing the Aquasust aeration bubble disc diffuser
If the aeration bubble diffuser needs to be removed from the air distribution pipe, the following basic procedures must be followed:
1. Shut off the air supply to the appropriate air distribution manifold.
2. Remove the existing aeration pan by turning it counterclockwise.
3. Reinstall the aeration pan by placing the aeration pan on the double socket and turning it clockwise.